Sunrise is my favourite time of day. The light is lovely and soft, the landscape is usually deserted and the world is just waking up. Even if there are no amazing colours it is still, in my opinion, the most magical time of day for photography.
So how do you go about capturing all this magic?
I thought I would write a short blog post that will hopefully help you if you are not used to photographing at the beginning of the day. I will use a recent sunrise shoot to illustrate how I go about planning, executing and processing my sunrise photography.
Planning
My sunrise session took place at Waldringfield on the River Deben. I have a few resources that I use on a regular basis to help me plan my sessions. These are:
Clear Outside – this is a weather app which tells you in detail what the weather is likely to do. I like it because it tells you the predicted amount of cloud in the sky broken down into low, medium and high level cloud. It also tells you the windspeed, humidity and dew point which will give you an idea of when mist might form. Basically to get a good sunrise you will need a good percentage of high level cloud and possibly some medium level but you won’t want low level cloud. It is the high level cloud that lights up and gives you the lovely sunrise colours. If you also have low wind speeds and high humidity you stand a chance of getting some mist forming.
My Tide Times – this is a tide table app which I use where ever I am around the UK. It has a good range of tidal stations so you can usually find tide times for a location very close to the one you want to photograph. I have used several tide table apps in the past but I find this one very easy user friendly.
The Photographers Ephemeris – is a location planning app that allows you to see the direction of sunrise, sunset and moon rise. It also allows you to see how the sun moves across the sky during the course of the day. You can do all this using a free account on your phone www.photoephemeris.com
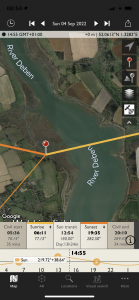 Photo Pills is a very similar app but you have to pay £9.99 to use it on a mobile device www.photopills.com
So using these resources the night before my planned shoot I learned that the tide would be high and the weather would be still, with high humidity and 80 – 100% high level cloud.
Using the Photographers Ephemeris I could see where the sun was predicted to rise and this allowed me to anticipate what my photographs might look like and what compositions I could use.
So how did all the planning translate to the conditions on the ground?
When I arrived at Waldringfield I decided to walk along the river and look for an old wooden jetty that I had photographed in the past. The angle of the jetty was not quite in line with the rising sun but I thought it would be good enough for a shot.
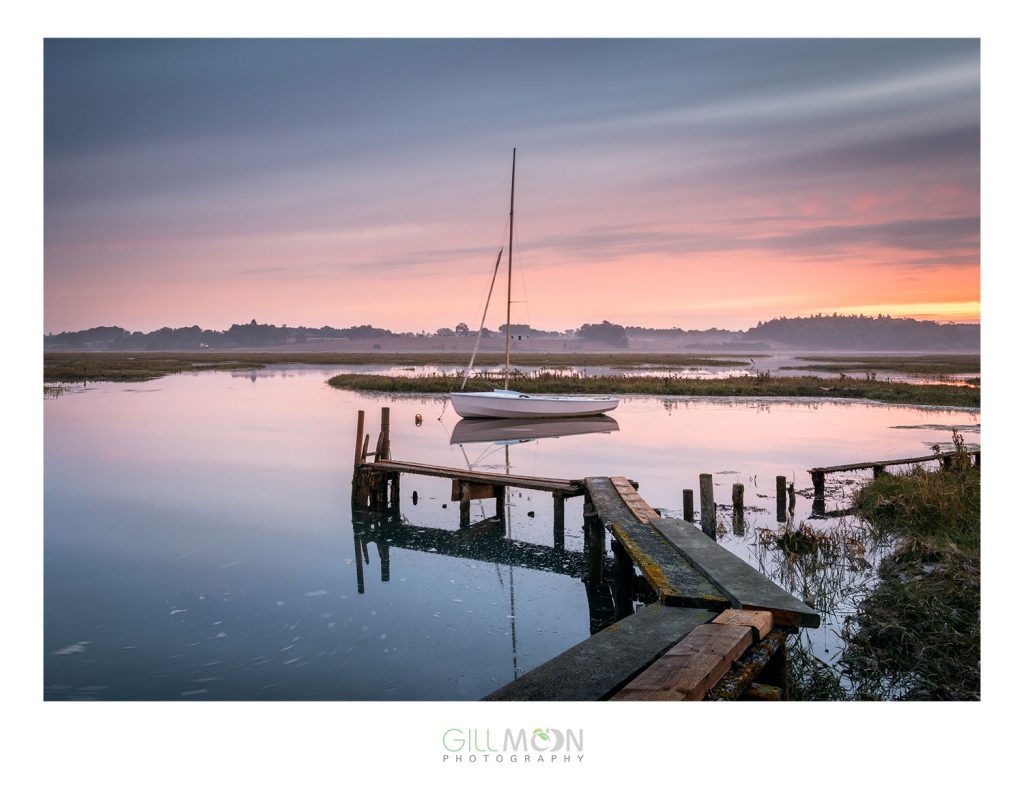
I arrived at my location half an hour before the sun was due to rise, set up my camera using a 0.6ND grad filter for the sky and took my first 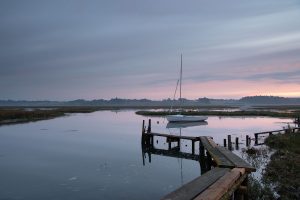 shot. I initially decided to shoot in a landscape orientation. This shot was a 30 second exposure at F11, ISO 200. The tide was still coming in at this time and the small boat at the end of the jetty was still grounded which allowed me to get away with the long exposure. A few minutes later it was floating and I had to up my ISO to shorten my shutter speed to ensure the boat wasn’t blurred.
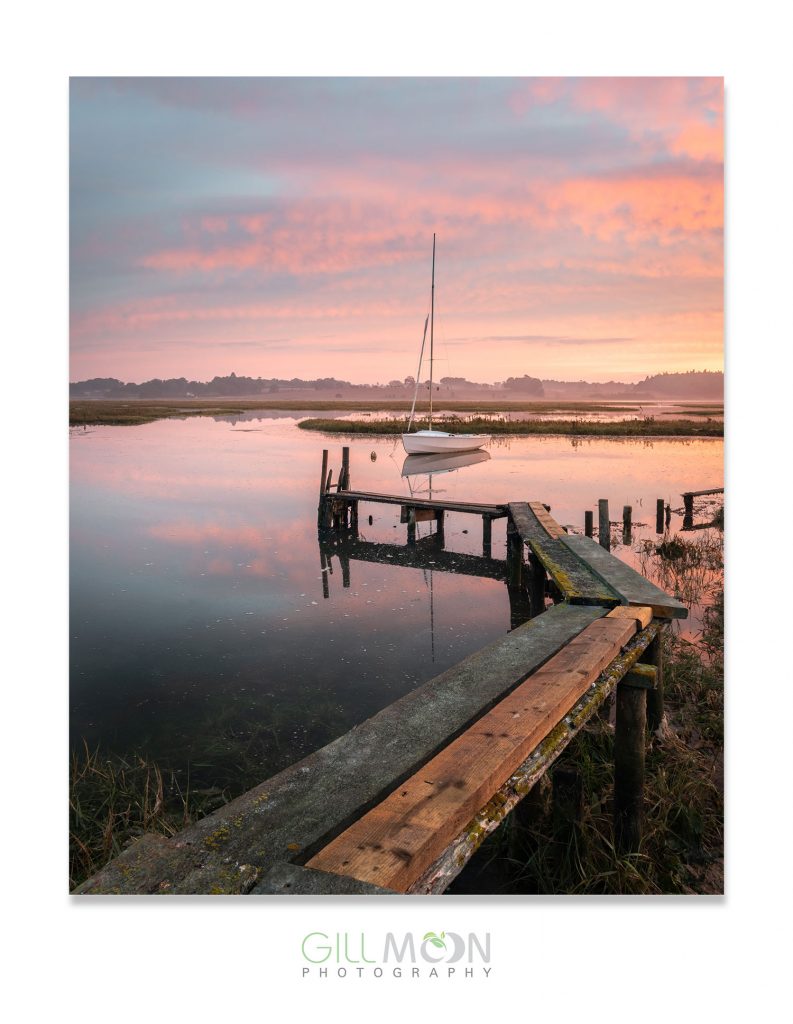
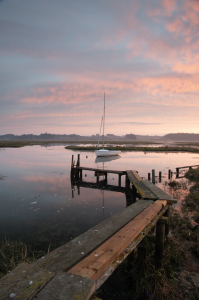 As the session unfolded I changed my composition and opted for a portrait orientation to capture more of the jetty in the foreground.
The sun was rising just out of frame on the right but the colours created by the high level cloud were perfect for the composition that I had chosen.
In some respects the shot was slightly compromised in that the direction of the jetty and the location of the boat, and the fact that I didn’t have any wellies (!) meant that I had to take the shot from the right hand side of the jetty. meaning I couldn’t shoot straight into the sun.
For the portrait shot I used a 0.6ND grad and a polariser to try and darken the foreground water. This was a 1.3 second exposure, shot at F14, ISO 400.
For this session I was able to get away with just using my 0.6 ND grad filter to balance the sky with the darker foreground. However there are other options including using reverse graduated filters if you are shooting directly into the sun. These have the darkest section of the filter located in the middle and are perfect for when the sun has just broken the horizon. Alternatively you can bracket your shots and combine them together afterwards in Lightroom using photo>photomerge>HDR.
If you would like more information about filters and their use in sunrise photography you can download my filter information here
Processing
Having taken a couple of different compositions over a period of about 35 mins I had 62 images to choose from when it came down to processing. I chose the two that I have already shown above (although these are the RAW files).
I process all my images in Lightroom and my workflow is generally the same for each image I work on. 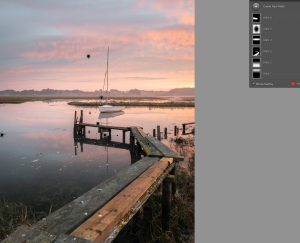
I choose the file I want to work on, do some overall adjustments to the whole image – usually exposure, highlights, shadows and maybe some whiles and blacks. I will then treat individual parts of the image using a range of adjustment masks. In the case of the image on the left I used a linear gradient on the top and bottom, a brush to highlight the jetty and some radial filters to lighten the centre of the shot where the boat sits and to darken the water in the front left. I then took the image into Photoshop to clone out any unwanted blemishes and to do some dodging and burning to emphasise some of the darker and lighter areas.
As with any processing it is always about knowing what you want to achieve with your image. Highlighting the areas you want your viewer to look at and darkening some of the surroundings to lead the eye to the important parts of the scene. All my adjustments are subtly applied – less is always more.
My final images from the session
Learn More
If you would like to learn more about sunrise photography I have several workshops available this autumn dedicated to sunrise and long exposures. They take place in the following locations: